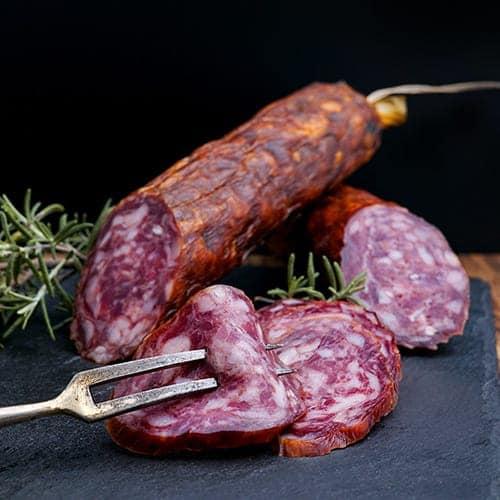
Sunday, May 20, 2012

Banana, Pear and Coconut Loaf – a reason to kiss your Greengrocer !


My favourite Greengrocer has obviously been paying attention to my War on Waste theme. “Do you want these love, they are gone beyond the beyond.” he said, handing over several kilos of freckly bananas, and a half-dozen Rocha pears that have seen better days.  “On the house”, he adds. “I can’t sell them and it’s a shame to chuck ‘em if you can use ‘em.”  Normally I have to wait a week until my newly purchased bananas overripen sufficiently for baking. These are perfect. Oh I could kiss him.

Through a combination of a shortage of time, a lack of butter, this unexpected excess of pears and bananas, and a craving for something sweet, I have messed with my old Banana Bread recipe. Here is the new quick and easy version. WOW! The coconut adds texture and a background creaminess. The pear makes the banana flavour POP. And the bonus is that it is quicker to put together and involves less washing up. What’s not to love!
For the absolutely best results hold your nerve until the bananas are practically black on the outside and the flesh is sweet, sweet, sweet.
Not quite the pick of the bunch but these freckly bananas are just perfect for baking

For a 2Lb loaf you will need:
... to pre-heat the oven to 160°C
250g very ripe bananas, mashed (that’s about 3 medium bananas)
100g sunflower oil (or other flavourless cooking oil)
100g caster sugar
2 eggs, beaten
250g plain flour
50g dessicated shredded coconut (unsweetened)
10g baking powder
1 teaspoon ground cinnamon
½ teaspoon baking soda
½ teaspoon salt
1 soft sweet ripe pear, such as Rocha, chopped into small pieces 
a little butter to grease the loaf tin 


1                    First, lightly butter and base line a 2 lb loaf tin. (To base line a tin, sit it on greaseproof paper or baking parchment and using a pencil, trace around it. Cut out the shape just inside the pencil lines. Lightly rub the inside of the tin with butter and position the paper in the buttery base. This makes it easier to remove the cake from the tin when cooked.)
2                    In a large mixing bowl, mash the bananas roughly using a fork or a potato masher. Add the oil and caster sugar and stir together until just combined. Next add the beaten eggs, again stirring until just combined.
3                    In a separate bowl, mix together the flour, coconut, baking powder, cinnamon, baking soda, and salt and fold these dry ingredients into the egg mixture until just incorporated and no dry mix remains. (To fold, add dry ingredients to wet and taking a spatula or a metal spoon, cut through the centre of the batter. Move the spatula or spoon across the bottom of the bowl, and back up the side and across the top bringing some of the cake mixture from bottom to top. Give the bowl a quarter turn and repeat. Keep folding the mixture and turning the bowl until the dry ingredients are incorporated into the batter. Folding avoids overworking the batter, giving a tender crumb in the finished loaf.)
4                    Transfer the batter to the prepared loaf tin and place in the preheated oven. Bake for about 50 minutes or until golden brown and cooked through. A cocktail stick inserted in the centre should come out clean. If there is batter clinging to it, pop the loaf back in the oven for a further 10 minutes then test again. Leave to cool in the tin. While you can eat it straight away, this cake is best wrapped in cling film and left for 24 hours before eating. A wonderful alchemy takes place and it becomes more banana-y, pear-y and utterly delicious.  
Evidence that it is time to cut another slice...

Note: I scattered about 50g of fruit-free muesli over the top of the loaf before baking to make it more presentable because it’s a homely looking loaf.

Sunday, May 13, 2012

Onion and Orange Marmalade – it’s time to magic up a pot


I have three amazing sisters who I would choose as friends if they weren’t already in my world. We have completely different lives, different styles, different ways of looking at the world. However we also have a lot in common. We have the same smile; the same wicked sense of humour that sometimes operates only on our wavelength; and thankfully most of the tears that are shed between us are tears of laughter.
We share a love of food, in particular a love of decent chocolate – my youngest sister even keeps chocolate in her first aid kit. We have been known to drive to the next county for proper fat chipper chips when a collective craving hits; and the jar of Sainsbury’s onion marmalade my mother keeps in her fridge mysteriously vanishes after a visit from the girls.
I’ve been experimenting however, and my taste buds think this onion and orange marmalade improves upon the Sainsbury’s version. It is a sweet and sour relish that loves cold meats, barbeques, cheese etc and is a doddle to make. As the picnic season draws near, it is time to magic up a pot.

For 1 small pot of onion and orange marmalade you will need...

4 tablespoons extra virgin olive oil
500g onions (prepared weight), peeled, cut in half from top to bottom and then thinly sliced into half moons
zest of an orange, (best removed using a vegetable peeler to slice off just the orange part, leaving the bitter white pith behind) finely shredded then cut into approximately 2cm lengths
160g granulated sugar
½ teaspoon fine table salt
¼ teaspoon ground cloves
100mls fresh orange juice
100mls white wine vinegar or cider vinegar
1 hot chilli (optional), left whole, but pierced through with a sharp knife

Simple ingredients...
1                  In a medium-sized heavy-based saucepan, heat the olive oil over a medium heat. Add the onions and the shredded orange zest and cook gently for about 10 minutes until the onions are translucent.
2                  Add the sugar, salt and cloves and continue cooking gently until the sugar has dissolved into the onion juices. When no sugar crystals remain, add the orange juice, white wine vinegar and chilli (if using). Turn up the heat and cook, stirring occasionally, until the onions are honey-coloured and no liquid remains. This will take about 15 minutes. (The mixture will burn the instant you step away from the hob so resign yourself to being there for the duration –treat it as therapy if necessary.)
3                  If you’ve added the chilli, remove it before carefully transfer the mixture into a sterilised jar. Seal when cooled and keep in the fridge for up to three weeks.  

Best eaten in the company of exceptional sisters (and/or brothers).

Tuesday, May 1, 2012

Honey, Lemon and Almond Tartlets – Having a Pollyanna moment!

Everything you need for a Pollyanna moment!

My parents are watching the Dublin skies with bated breath, hoping that they are not going to be flooded again. I can’t even think about soggy carpets and destroyed books without getting upset on their behalf so I am going all Pollyanna and I am going to bake some golden tartlets and pretend it’s not happening.
These honey, lemon, and almond tartlets are a little bite of summer, and I guess if the worst comes to the worst, my parents could always lash them together and use them as a raft...

For 18 tartlets you will need...
... to pre-heat the oven to 160°C at step 3

Sweet Pastry
175g butter
75g caster sugar
1 tablespoon finely grated lemon zest
1 egg, beaten
260g plain flour
a pinch of fine table salt 

1                    Using a stand mixer (or a large bowl and plenty of elbow grease) cream together the butter, sugar and lemon zest. When light and fluffy and paler in colour, mix in the beaten egg and continue beating until combined. Add the flour and mix until it forms a soft paste. Shape the paste into a ball using floured hands. Flatten into a disc about 2.5cm thick (1 inch) and cover with cling wrap. Refrigerate for at least 30 minutes, or overnight.
2                    Roll out the chilled pastry to a thickness of about 2mm (about as thick as a euro/pound coin). Cut out 18 rounds using a 10 cm (4 inch) round cookie cutter – or a flower-shaped cutter as shown in the photos. Line muffin tins with the pastry rounds. If any holes develop, simply use excess pastry to patch them up, pressing firmly into place – it’s a very forgiving pastry. Return to the fridge and chill for a further 30 minutes.
The pink flower-shaped cutter definitely adds Pollyanna-bility to the process!

Filling
4 egg yolks
100g runny honey
170mls double cream
1 tablespoon grated lemon zest
100g breadcrumbs
75g ground almond  

3                    Place the egg yolks in a large bowl and whisk lightly while you add the runny honey. (I usually place the bowl on a weighing scales and weigh the honey directly into the bowl as I whisk – anything to save on sticky washing up). When the honey and eggs are mixed, add the cream and grated lemon zest and whisk until combined.  Add the breadcrumbs and almonds and mix until no dry breadcrumbs remain.
4                    Remove the chilled pastry cases from the fridge. Divide the filling between the pastry cases, allowing approximately 1 tablespoon of the mixture per tartlet. Transfer to the pre-heated oven and bake for 20 – 25 minutes until the filling has puffed up, is golden brown and feels spongy when pressed lightly with a finger. Carefully remove from the muffin tins and cool on a wire rack. Serve warm or cold with ice cream or whipped cream. 


Right, I’m off to eat that photo at the top of the page and think pleasant thoughts, although if anyone knows the opposite of a rain dance, please feel free to interrupt my Pollyanna moment.

Friday, April 27, 2012

Asparagus – a feast of ferns !


Over the years, several strange gifts have appeared on my doorstep. Once, just after moving into a new home, the doorstep vanished under a stunning 12ft Christmas tree ... I took an educated guess and reciprocated with homemade mince pies, wonderful neighbour.
Less delightfully... in a different house on a stormy Hallowe’en, I went to answer a loud knock at the door. There, glowing eerily in the darkness, was a large, elaborately carved Jack-O-Lantern, complete with flickering candle. That was plain spooky, particularly given how isolated the house was. I slammed and double-locked the door.
Apart from the odd tray of seedlings/bottle of Baileys from the neighbours, nothing unexpected or mysterious has appeared on my last few doorsteps ... until this week. Just as I was craving healthy greens, there appeared a bouquet of asparagus. I am utterly clueless as to where this beautiful bouquet came from, but I know exactly how I am going to deal with it.
I am going to bend each fat fern until it snaps, leaving a woody stalk (for vegetable stock) and a tender spear.
Then...
My No. 1 way of cooking asparagus:
I am going to take enough spears to feed two people, anoint them with extra virgin olive oil, spread them in a single layer on a baking tray, sprinkle on some Maldon sea salt and a twist of black pepper and roast them at 180°C until the tips start to crisp and brown – about 10 minutes - to be eaten immediately, forks optional.

Awesome asparagus!
 The rest of this gorgeous bouquet of ferns will be lightly pickled in olive oil and lemon juice as follows:
275mls white wine vinegar
225mls extra virgin olive oil
100 mls freshly squeezed lemon juice
zest of 1 lemon, cut into large strips. (try to avoid the white pith as this can be very bitter)
3 or 4 sprigs of fresh mint
2 tablespoons granulated sugar
2 teaspoons fine table salt
500g asparagus spears

You will also need a 1 litre sterilised jar (run it through the dishwasher, or wash it thoroughly and dry it in the oven at 100°C).

1                    Place all the ingredients except the asparagus, in a large saucepan over a medium heat and bring to the boil, stirring once or twice to make sure the sugar has dissolved.
2                    When the mixture is boiling carefully add the asparagus spears. Cover the saucepan with a lid and continue to let the mixture bubble for 5 minutes. Remove from the heat.
3                    Transfer the hot asparagus to the jar, then pass the liquid through a strainer, into the jar to cover the asparagus. Leave to cool before sealing. Store in the fridge for up to two weeks, although it is ready to eat straight away – as a starter, or added to salad. Allow to come back to room temperature before serving to get the full delicious asparagus/lemon flavour. The pickling juice also makes an unusual salad dressing. 

Pickled asparagus won't win any beauty contests but your tastebuds will love it!
   
Pickled asparagus isn’t going to win any beauty contests but oh, your tastebuds will love it!
__________________
Cork World Book Fest Food Blogging Workshop - I had a blast in Cork last weekend giving the food blogging workshop. It was booked out despite the nasty weather and it was a delight to meet both seasoned and fledgling bloggers and to see that the Irish Food Bloggers Association was well represented. A huge thank you to my hosts, Cork City Libraries, and their awesome librarian, Ann Riordan!

Tuesday, April 17, 2012

Chocolate Éclairs - a 'First Class' Pastry !

'First Class' pastries...

For years I thought ‘excursion’ was a euphemism for “let’s take the kids out and see if we can’t all catch pneumonia”. You see, I often visited my Gran for summer holidays in Cork, and she would mastermind 'excursions' to the charming seaside town of Cobh for me and my million-or-so cousins.
This was always a recipe for great excitement – cousins you hadn’t seen in a year, a train journey through beautiful countryside, the anticipation of a picnic, the seaside. What more could a bunch of kids want!
No matter how blue the sky started out, it always, always, always lashed rain before we got home. I think Cobh has a special soak-you-to-the-skin kind of rain - although we Irish seem peculiarly unable to dress for the prevailing weather so maybe that has something to do with it too.
I returned to Cobh recently to meet my beloved’s Californian relatives whose cruise liner had docked for the day. As we waved goodbye, it struck me that almost a hundred years ago, Titanic had been waved off from the same dock.
Apart from the Titanic anniversary, I have a special reason for mentioning Cork this week. I am delighted to be running a food blogging workshop next Saturday for Cork City Libraries as part of their World Book Fest Constant Reader programme. If you are in the area, drop in. Free tickets for the event can be booked here.
In keeping with the Cork/Titanic theme, Chocolate Éclairs were on the First Class menu that fateful night of 14th April, 1912. If I’d been on board Titanic and somehow managed to sneak into First Class, these are what I would have pinched off the dessert trolley.
For 8 – 10 éclairs you will need...
... to pre-heat the oven to 180°C
Choux Pastry
150mls water
50g butter, cut into cubes
70g strong white flour/plain flour
a pinch of fine table salt
2 large eggs beaten
½ teaspoon vanilla extract

Filling
300mls of fresh cream, whipped
1 tablespoon of icing sugar (sifted)
½ teaspoon vanilla extract

Simply mix these three ingredients together to make the filling.

Topping
100g good quality dark chocolate, melted


1                    Heat the water and butter together in a medium saucepan until the butter has melted and the liquid is simmering
2                    Remove from the heat, then carefully tip the flour and salt into the liquid in one go. Stir with a wooden spoon until the mixture comes together in a soft smooth ball of paste and no dry flour remains. Spread the ball of paste over the bottom of the saucepan and leave to cool to room temperature.
3                    When the paste has cooled, add the vanilla extract to the beaten egg, then add the egg to the paste a little at a time, whisking well between additions. An electric whisk is best for this job. You want a smooth glossy soft paste that will hold its shape so check the mixture as you go along as you may not need to add all the egg.
4                    Transfer the mixture to a piping bag with a 1.5cm plain nozzle and pipe lines approximately 10cm long onto a baking sheet lined with non-stick baking parchment, leaving approximately 6cm between pastries. Transfer to the oven. Bake for approximately 20-25 minutes or until evenly golden brown. Remove from the oven and poke a small horizontal slit in the side of each pastry to release some steam. Return to the oven for a further 2 minutes before removing to cool on a wire rack.
5                    Assemble the éclairs just before serving: slice them in half horizontally and fill with the flavoured whipped cream. Drizzle a little melted chocolate over each.  


Tip: Pop a roasting tray with a handful of ice cubes into the bottom of the oven a few minutes before putting the pastries in to bake. This helps create a steamy atmosphere and helps the pastry to puff up beautifully.

Thursday, April 12, 2012

Honeycomb – a Schoolgirl Crush that has Lasted and Lasted !


I think many of my schoolmates will remember one of our science teachers – Mr Divine (uh huh!). Although he seemed ancient at the time, he was barely out of school himself and maybe that’s why he was among the few that were able to connect with a class of unruly 12 year-olds.
He set up experiments that interested us – distilling Poitín for instance, or manufacturing lipstick.  My favourite experiment seemed like alchemy to me – he combined a few simple ingredients, added heat, and made a huge bubbling mass of honeycomb. I think more than a few of us fell in love with Mr Divine that particular day.

While my schoolgirl crush on Mr Divine has long since disappeared, my love for this sweet treat has lasted and lasted.
For a sweet treat practically conjured out of thin air you will need...
200g caster sugar
100g honey
2 tablespoons cold water
1 teaspoon white wine vinegar
1/8 teaspoon fine table salt
1 ½ teaspoons bicarbonate of soda 

1                  Line a 21cm (8”) square tin with non-stick parchment paper.
2                  Weigh the sugar and honey directly into a saucepan large enough for the mixture to expand up to 5 times its original volume. Add the water, vinegar and salt and heat gently until all the ingredients have melted together.
3                  Now, turn up the heat and let the mixture bubble without stirring (stirring can recrystalise sugar (although, feel free to give the saucepan the odd swirl if you like.) If you have a sugar thermometer it should reach ‘hard-crack’ (149° - 154°C or 300°F  - 310°F. If you are working by eye, let the mixture bubble until it is a dark golden honey colour. Do not go to answer the door. Do not pick up the phone. This stuff is hot and will burn the instant you take your eyes off it.

Do not pick up the phone! Do not answer the door! This stuff WILL burn.

4                  Have a whisk ready for the next step: Remove the saucepan from the heat, and quickly add the bicarbonate of soda. Give the mixture a quick stir to disperse the bicarbonate – it will foam up impressively. Quickly pour the mixture into the prepared tin. Resist the urge to spread it out as you’ll only pop the bubbles. It is self-leveling.
5                  Allow to cool – when nearly cool you can score it with a knife if you want to break it into regular shapes or simply break it into pieces when cold.  Store in an airtight container and use within 24 - 48 hours, particularly if the weather is humid.

Here's to the little guy who made it all possible!

While this honeycomb is rather good just as is, here are two more ways to enjoy it.
Melt 150 dark chocolate and give the cooled honeycomb a bath. Allow excess chocolate to drip off before letting the chocolately pieces set on non-stick parchment paper.
Take a tub of good vanilla ice cream out of the freezer and let it soften before stirring in a handful of finely chopped honeycomb and returning to the freezer to firm up.

Wednesday, April 4, 2012

Hot Cross Buns – and an Invitation to Commit Gluttony!


As a child, one of the great treats of staying with my Gran in Cork City was that her local bakery produced great Hot Cross Buns at Easter. Maybe my taste buds are suffering from nostalgia, but I haven’t been able to find a bakery since that can produce a bun of comparable deliciousness. Many commercial versions taste like a mouthful of sawdust – a penance indeed. Experience has taught me that these Easter buns are a creation often best baked at home.
Easter is thought to be named after the Anglo-Saxon goddess of Spring, Eastre, and some believe this sweet spiced bread was baked in her honour. It makes much more sense to me that these sticky treats are a celebration of springtime and abundance to come rather than an invitation to commit Gluttony in the dying days of Lent. Whatever you believe, they are delicious.

For 12 tempting buns, you will need...
... to preheat the oven to 190°C at step 7

For the dough
500g strong white flour (bread flour)
1 teaspoon fine table salt
1 teaspoon ground cinnamon
1 teaspoon grated orange zest
1 sachet of dried yeast (7g)
1 tablespoon olive oil
75g ready-to-eat dried apricots, cut into small pieces (about the size of sultanas)
50g sultanas
75g honey*
300mls fresh milk
1 large egg, beaten 

a little extra olive oil for oiling the work surface and your hands for kneading

For the cross decoration
2 tablespoons plain flour
2 tablespoons water 

For the honey glaze
One tablespoon runny honey, warmed (I put it in a heatproof bowl and stand the bowl in hot water).
Remember that scene from Fried Green Tomatoes...
1                    Into a large bowl, put the flour, salt, ground cinnamon, orange zest, dried yeast, olive oil, dried apricots and sultanas. Mix to combine.
2                    *Weigh the honey directly into a small saucepan and add the milk. Warm the milk to between 27°C - 35°C (this is when a finger dipped in the milk will feel neither hot nor cold – but best to use a thermometer).
3                    Make a well in the centre of the flour mixture and add the beaten egg, and about half the milk. Mix with a wooden spoon or spatula and continue adding the milk until you have a soft dough and no dry flour remains. You may not need to use all the milk. Continue mixing until the fruit is well distributed throughout the dough. (You could use a stand mixer with a dough hook either.)
4                    I am shifting more and more towards the no-knead method so I simply cover the dough with a lightly oiled sheet of cling film and leave it in a warm place to rise until doubled in size. (If you prefer, knead it by hand for about 8 minutes or in your stand mixer for about 4 minutes before covering and leaving to rise.)
5                    After the dough has risen, turn it out onto a lightly oiled work surface, and knock it back. (This simply means giving it a couple of jabs with your fists to remove most of the air so you can form it into its final shape.) Knead lightly for a minute or so, before dividing into 12 equal portions. Roll each portion into a ball on the oiled surface, and flatten slightly into a bun shape. Line a baking tray with non-stick baking parchment and gently transfer the buns to the tray. Cover the buns with lightly oiled cling film and leave in a warm place, until once again doubled in size. Make sure the buns have plenty of room to rise.


6                    Meanwhile, make the paste for the cross by mixing together the flour and water - you want a smooth paste with a consistency similar to porridge.
7                    When the dough has once more doubled in size, remove the cling film. Carefully pipe the cross shape onto each bun. Transfer to the pre-heated oven and bake for 10 – 12 minutes or until golden brown. Transfer the buns to a cooling rack and immediately brush them with warmed honey.
An orange blossom honey makes the perfect glaze

It is considered good luck to share these buns and the cinnamon and orange make them particularly good with coffee so what better excuse to invite some friends over! 

Lead me not into temptation... well, perhaps just the once!